DIY Digitally
Digital Scrapbooking
The holidays are just around the corner. One gift idea that you might consider this year would be to create & frame a scrapbook page for someone special in your life. You don't have to buy any materials at the craft store--maybe just a frame. Your DIY project can be created using free "themed" digital kits (filled with various backgrounds, graphics, word-art) that are available online!
What's needed:
Photo editing software, digital templates (free online & available for purchase), and photographs.
What's needed:
Photo editing software, digital templates (free online & available for purchase), and photographs.
Here's your basic "how to" and a video tutorial at the end of this page.
1) Open file.
2) Drag pictures & graphics to digital layout & arrange accordingly.
3) Make adjustments to your liking by using the MOVE tool.
4) Afterwards, add some text.
5) Save layout as a .psd file, just in case you need to revise it or use for another project.
6) When you're ready to print your project, save it as a JPEG file.
There's one caveat when saving your project. Once you save it as a JPEG file, you cannot go back and edit. So, keep a copy of the .psd file. Remember, you can only edit in .psd mode.
After some practice, you can create pages such as these.
Drag & drop embellishments onto your photo layout to give your page some pop!
Here are a few that I've framed & given as gifts to various family members.
Drag & drop embellishments onto your photo layout to give your page some pop!
Here are a few that I've framed & given as gifts to various family members.
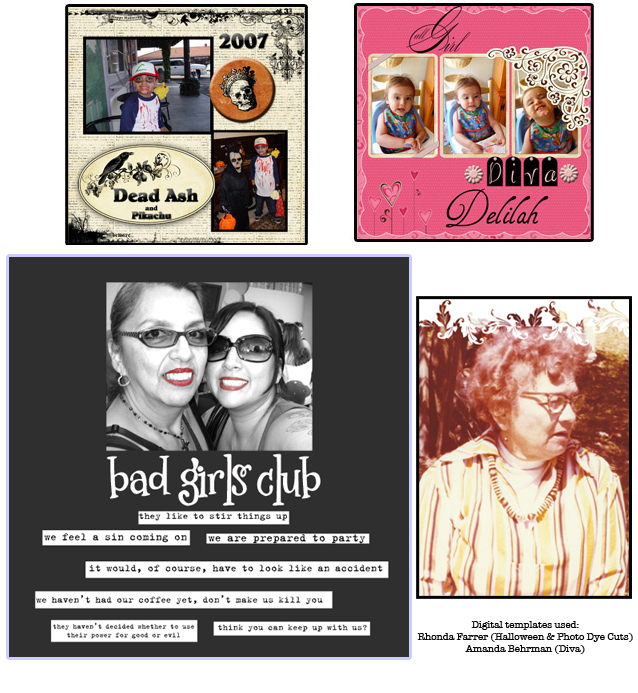
These digital pages were created using templates that I found online.
Why don't you give it a try?
In this pre-filled layout, all I had to do was merge the soldier's picture with the frame. Notice the border on the frame surrounds the photograph after the merge & there's text on the black emblem.

"John Arias," photograph courtesy of L. Avaloz, Arias family archives.
How did I do that?
Take a look at this tutorial (by the way, there's no sound. It's self-explanatory--follow the cursor):
Take a look at this tutorial (by the way, there's no sound. It's self-explanatory--follow the cursor):
All digital pages created by Me!
k.a. - 2016
k.a. - 2016
